Set up your site to accept PayPal payments
In order to complete this task, you'll need the "Store Manager" role or the "Site Admin" role.
Be sure to flush the cache after assigning any new roles to ensure that all menu items appear correctly.
Step One
Go to: Settings & Admin > Feature Settings > Store Settings > Payment methods
You'll be editing an existing payment method, so you d not need to click "add new payment method"
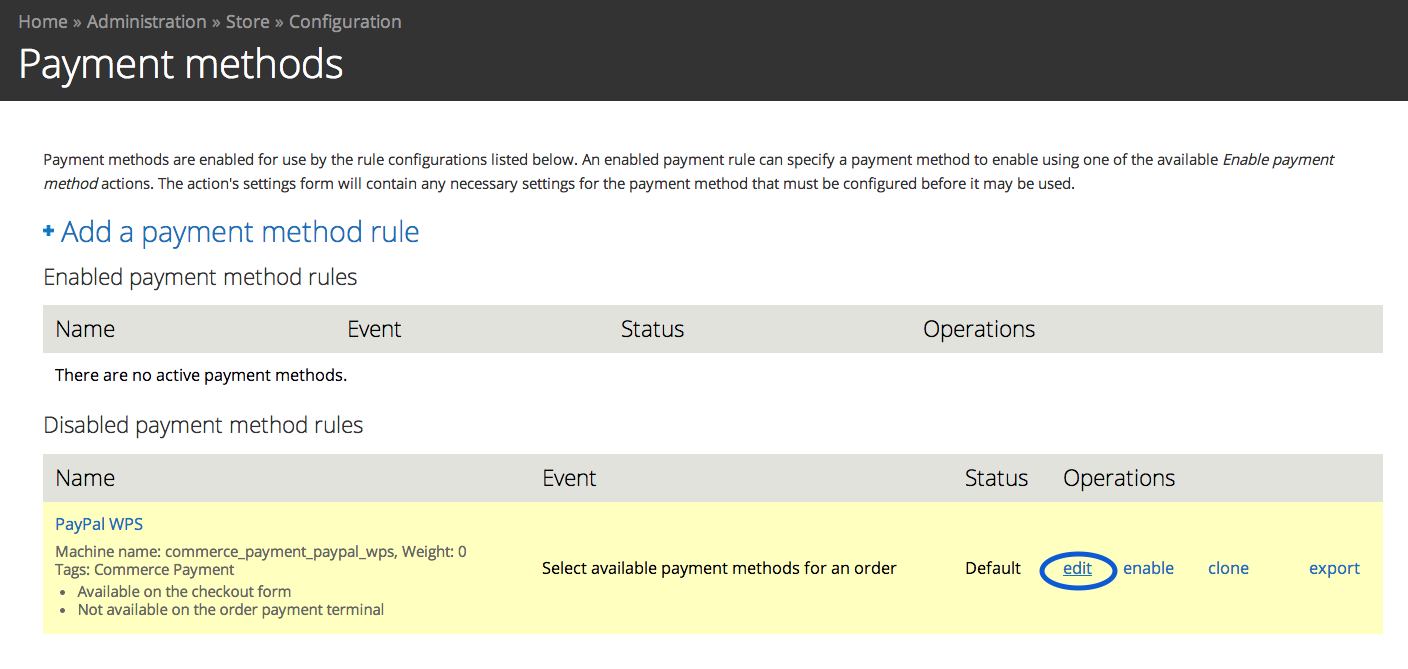
Step Two
Click on the "edit" link for PayPal WPS.
Note that at this time, the Paypal plugin is still disabled. We're currently moving through the edit screens to cset of the configurations before we enable the payment method.
You'll need to click the "edit" link on the next screen as well.
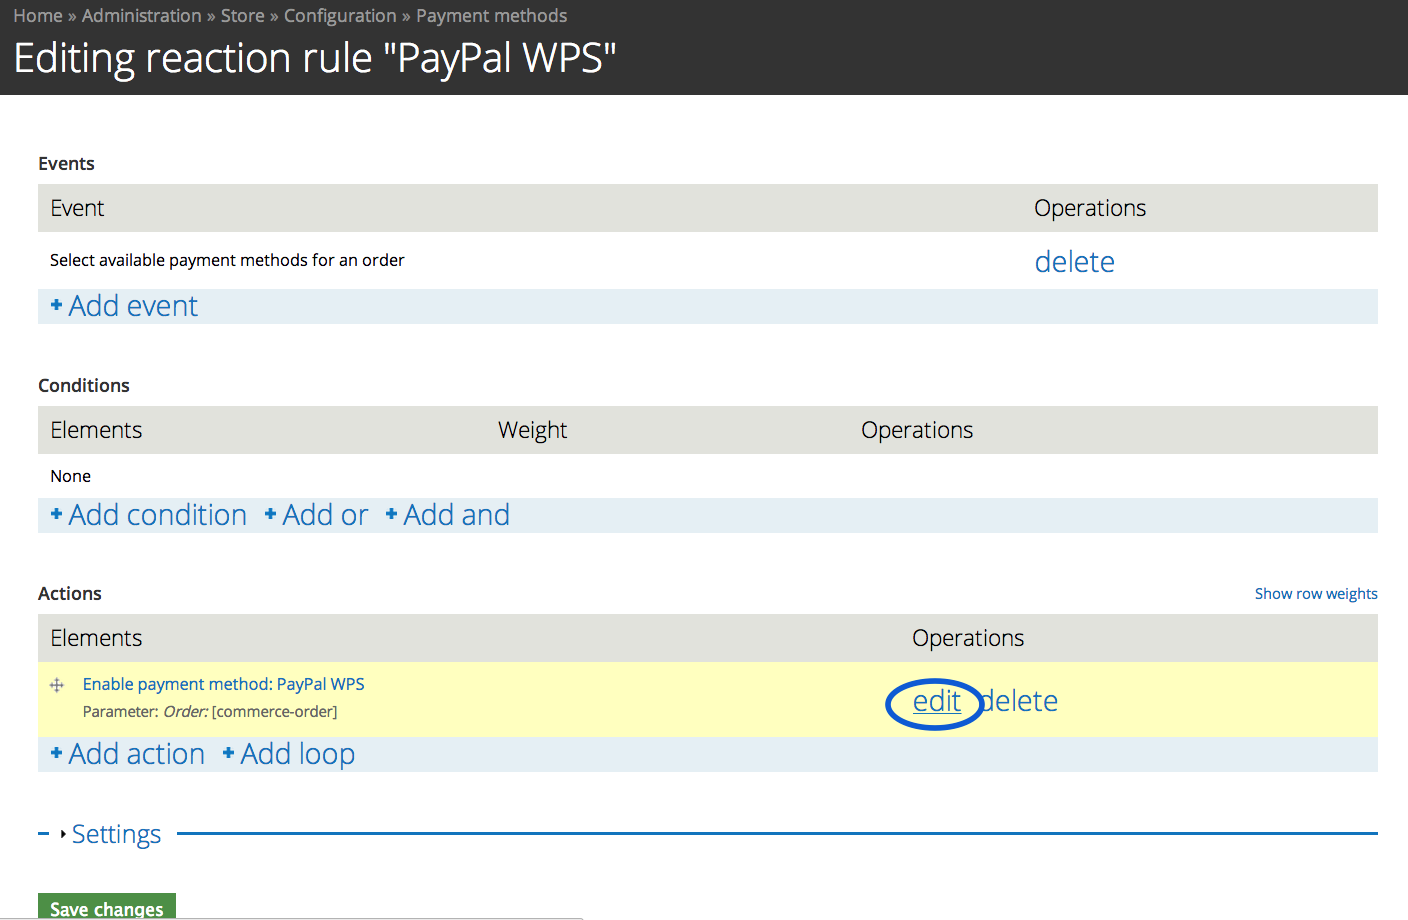
Step Three
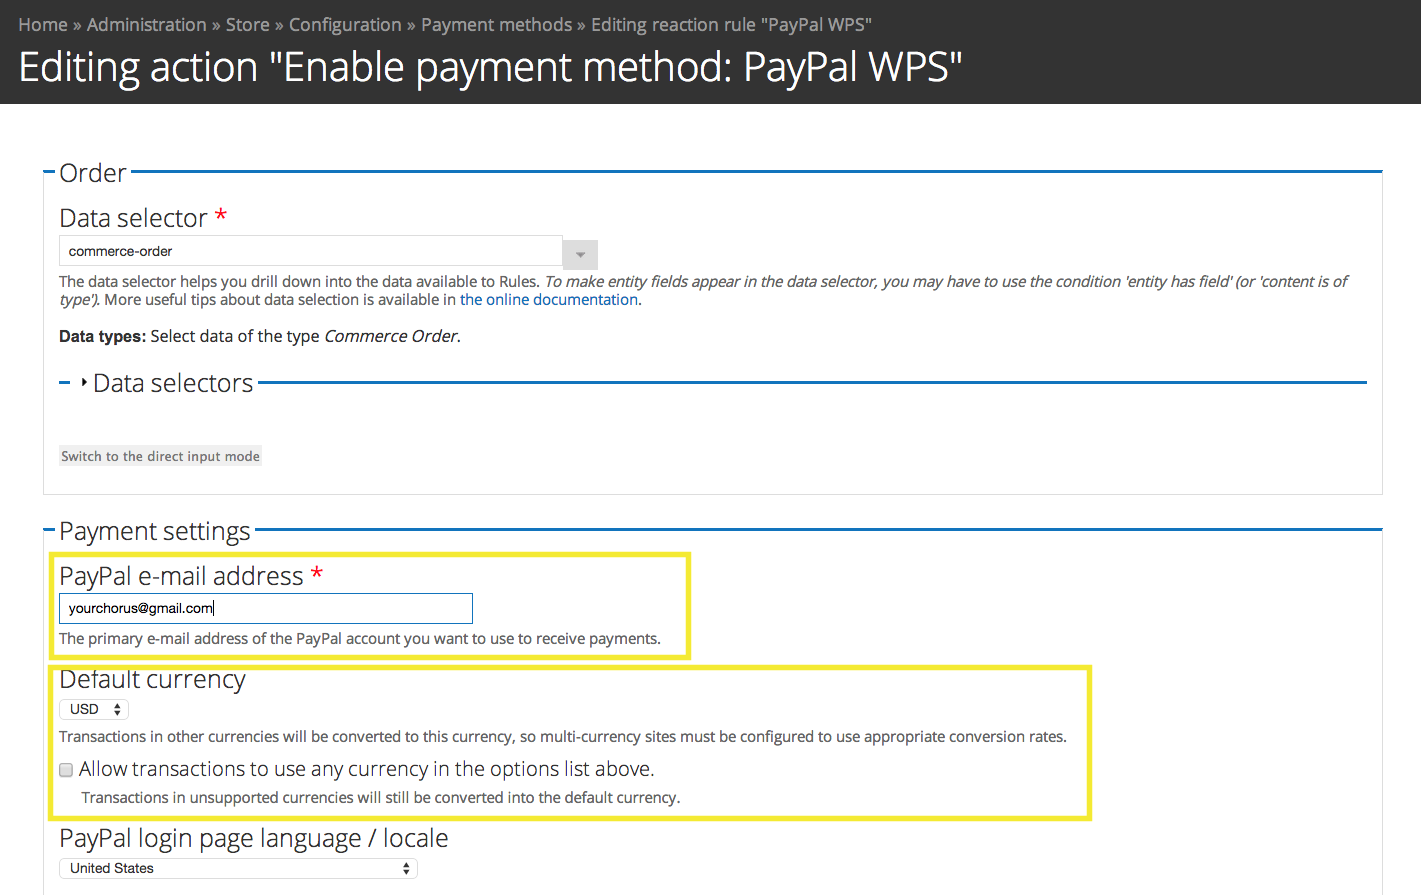
On this page, you'll need to configure the plugin with your PayPal information.
You'll need to:
- Fill in the email address you use for your PayPal account
- Set the default currency, and if you'll allow your members to use alternate currency
- Set the PayPal server to "Live"
- Select the option to create a billing profile based on name and country data in the IPN for any order that does not have one yet.
These areas are highlighted in the screenshots below.
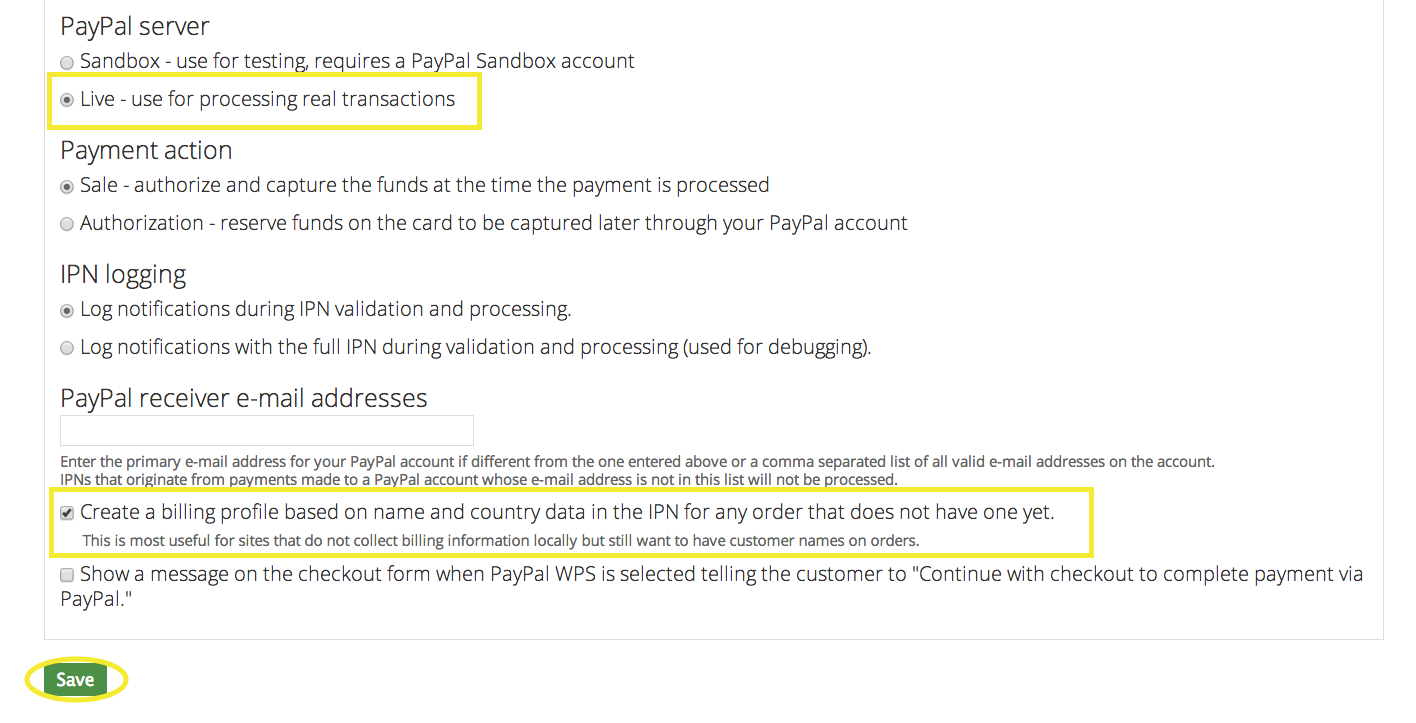
Remember to save when you finish filling our the aforementioned fields.
Step Four
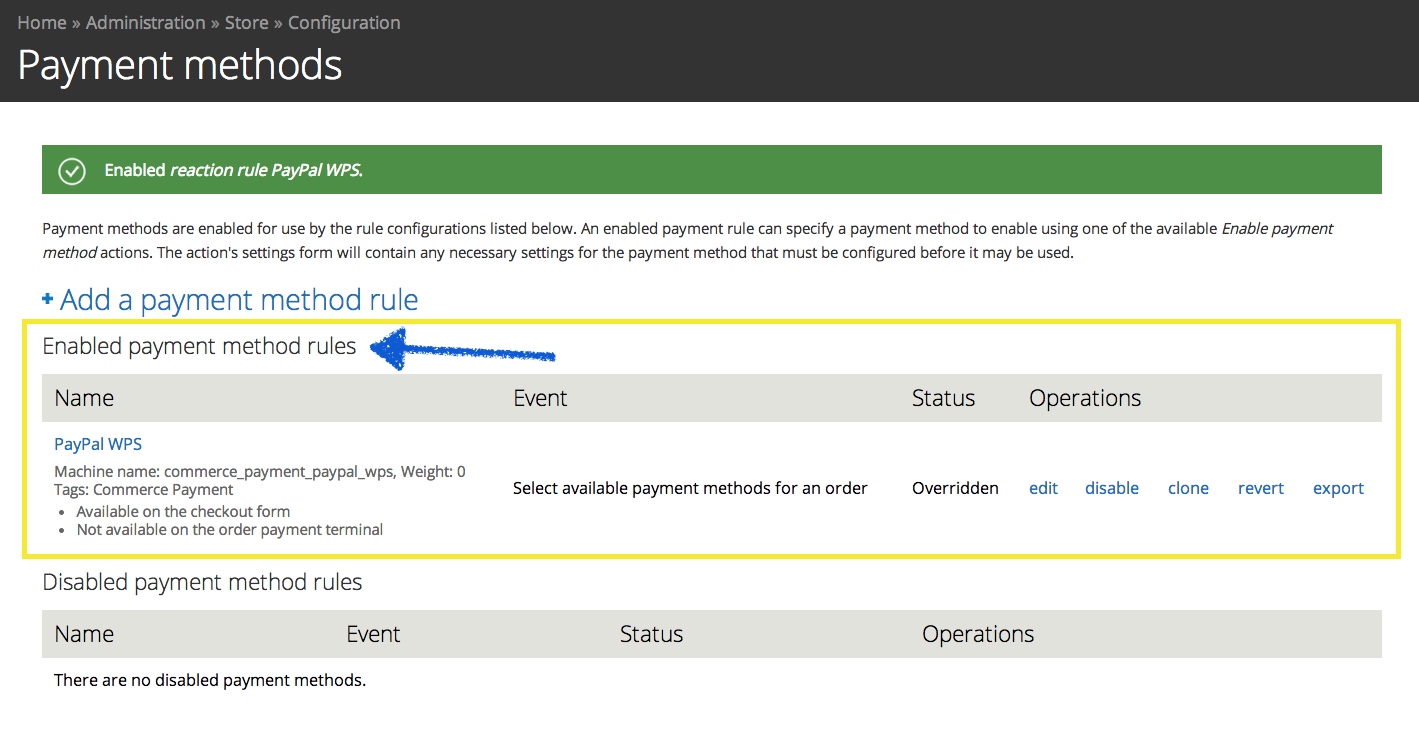
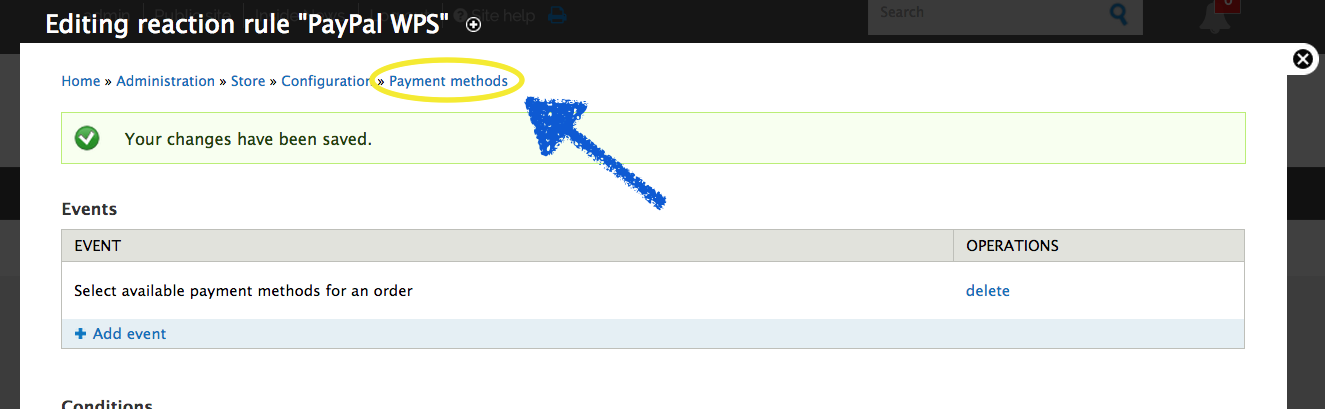
Once you've saved the page in the last step, you'll be brought to a confirmation page. You'll then need to navigate to the very first payment methods configuration page. You can do so by clicking on the "Payment methods" breadcrumb (pathway link) at the top of the page.
Step Five
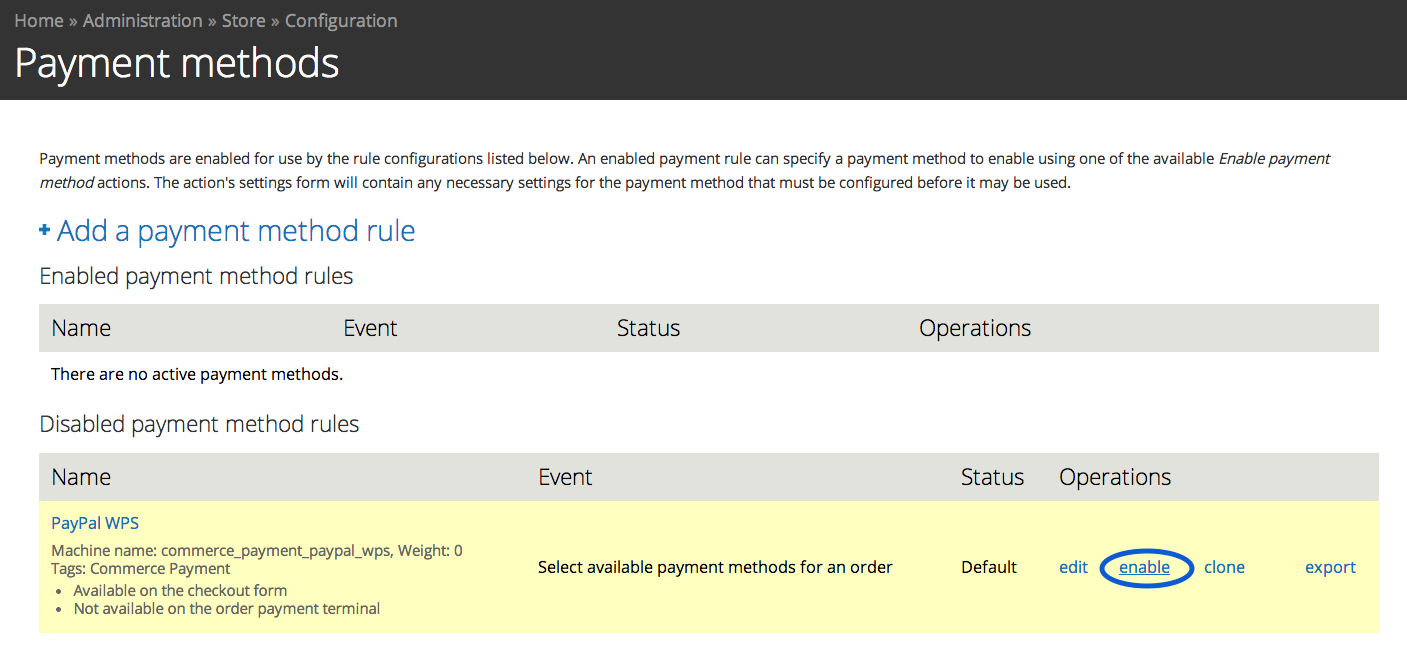
At this point, we've configured the settings to connect to your PayPal account, but we still need to enable the payment method. You can do this by clicking on the "enable" link.
It will then ask you to confirm the change.
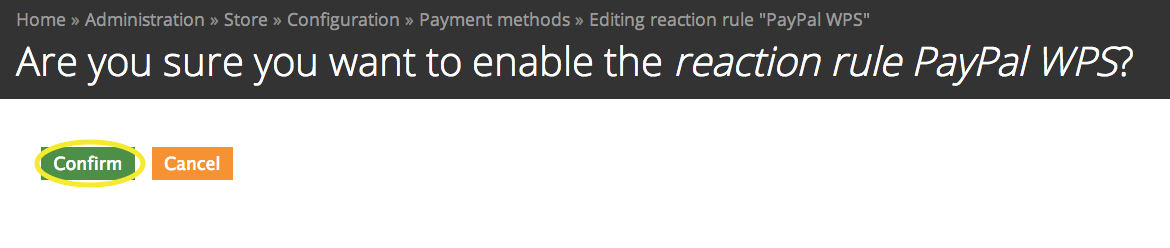
Once you've confirmed the change, the page will reload with PayPal WPS as an enabled payment method rule.