Setting up Music Learning and assigning checkers
This article covers:
- configuring the learning states
- changing what roles have access to specific learning states
- setting up the defaults for music learning
- using the checker assignment page
- enabling music learning on individual pieces of music.
Configuring the available learning states
In the main menu, o to: Settings & Admin > Site settings > Taxonomy
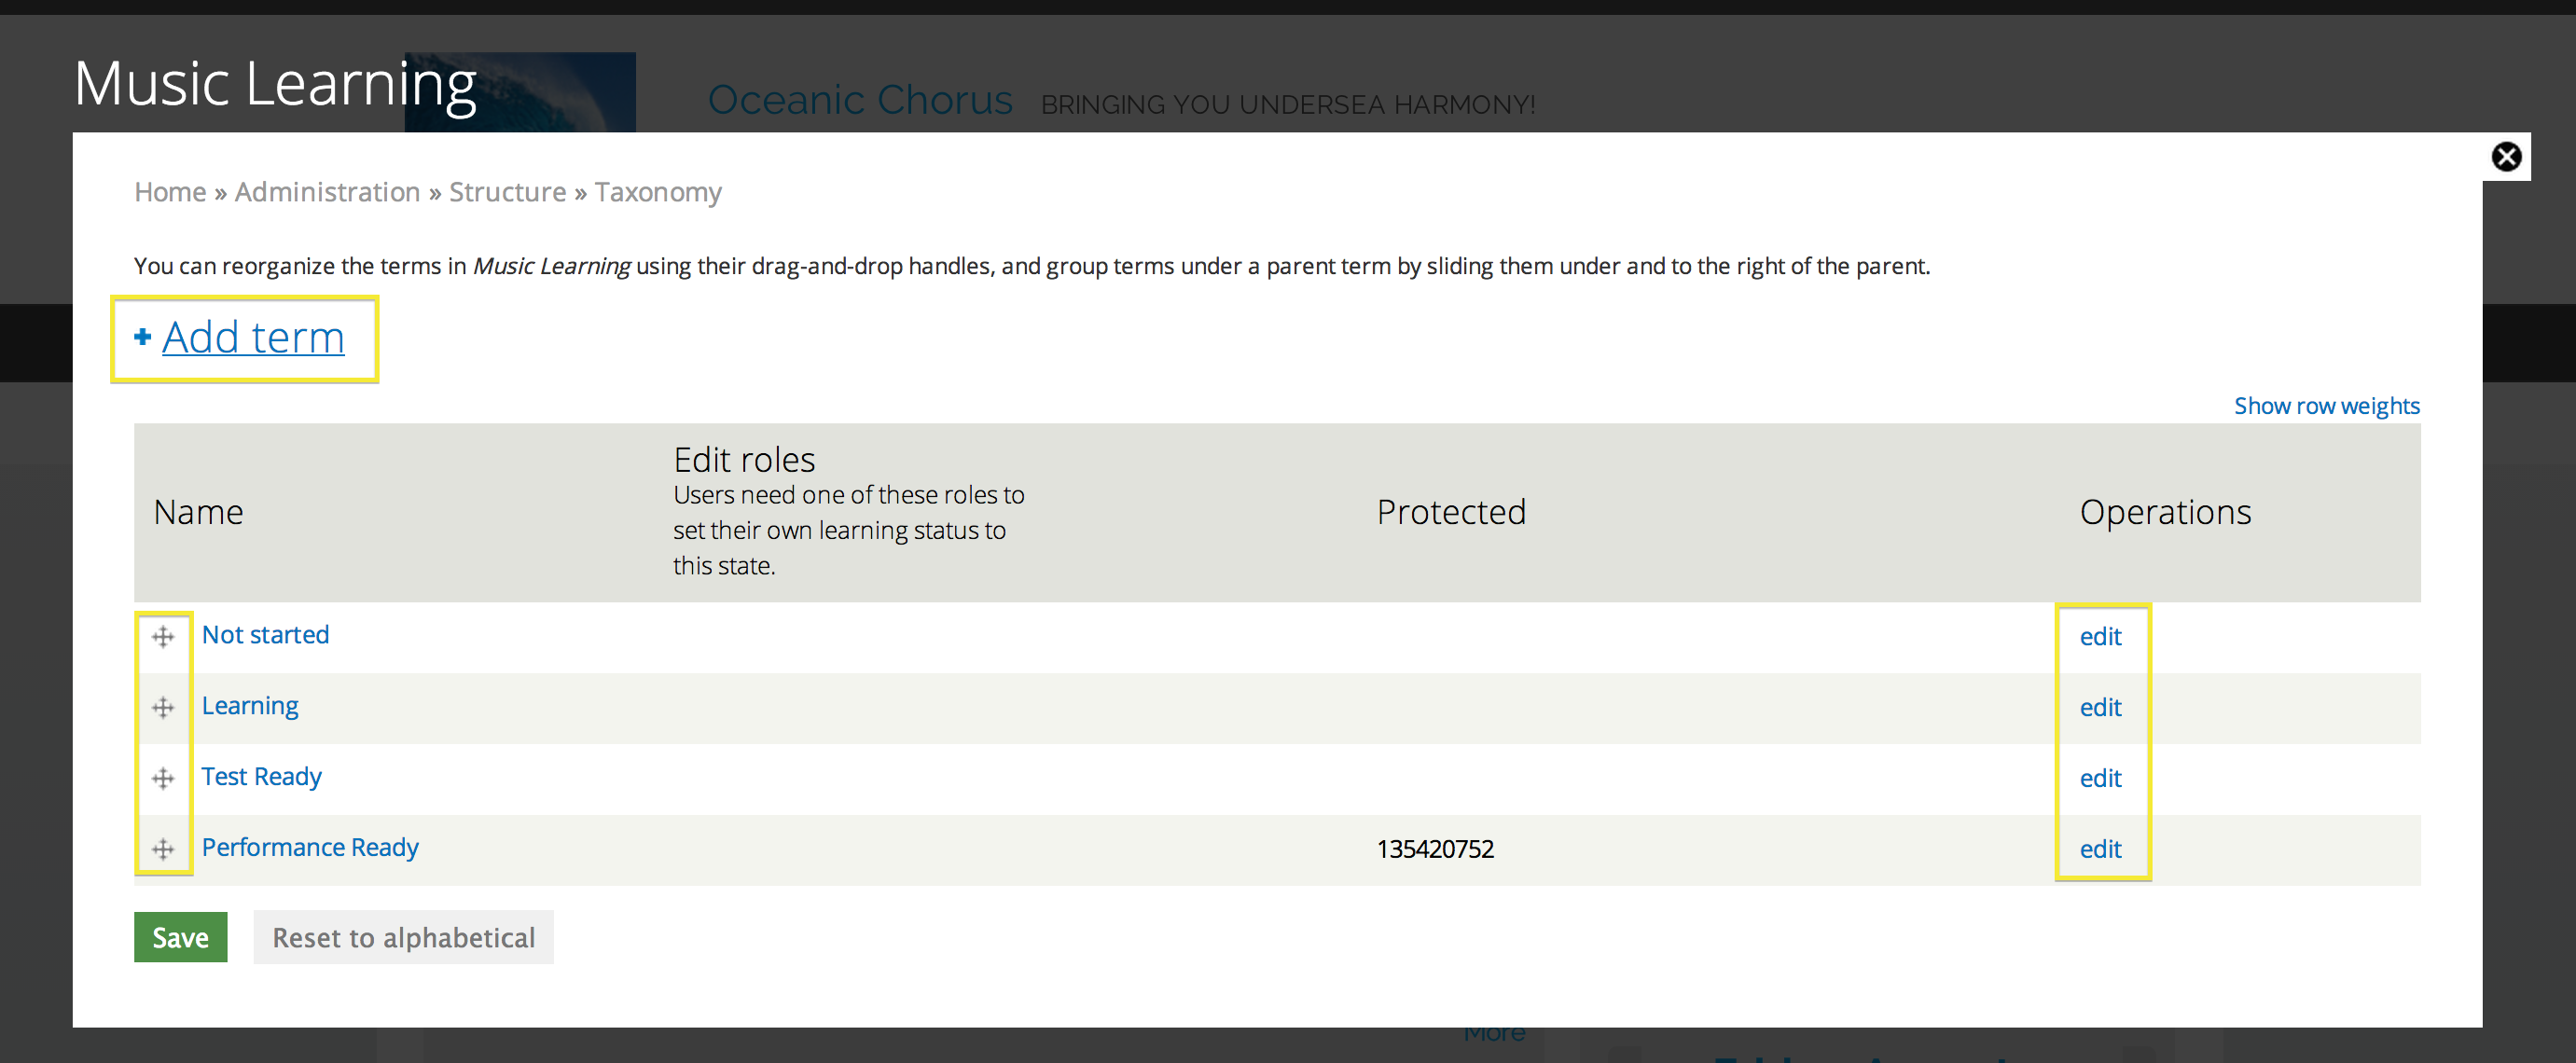
Then choose to list the terms for "Music Learning"
On this page, you can add new states (via "add term"), change the position of the existing terms (via the arrows on the left - just drag and drop), or edit existing terms (via the "edit" links on the right). When you're done, remember to click save.
Note: The order in which these terms appear affects the colours associated with them. The natural flow from one state to the next should move a user down the list. Items at the top will be red, and items at the bottom will be green (gradients of orange to yellow will be used for states in the middle).
Editing who can move a user to specific learning states
First, follow the directions above to get to the Music Learning taxonomy page
(Settings & Admin > Site settings > Taxonomy, then select list terms for Music Learning) and then click edit for one of the terms.
On the edit page for the term, there is a field near the save button labeled " Edit roles". You can add roles here - so if you'd prefer members to be able to update their own progress, just click the text field and then select from the roles in the list.
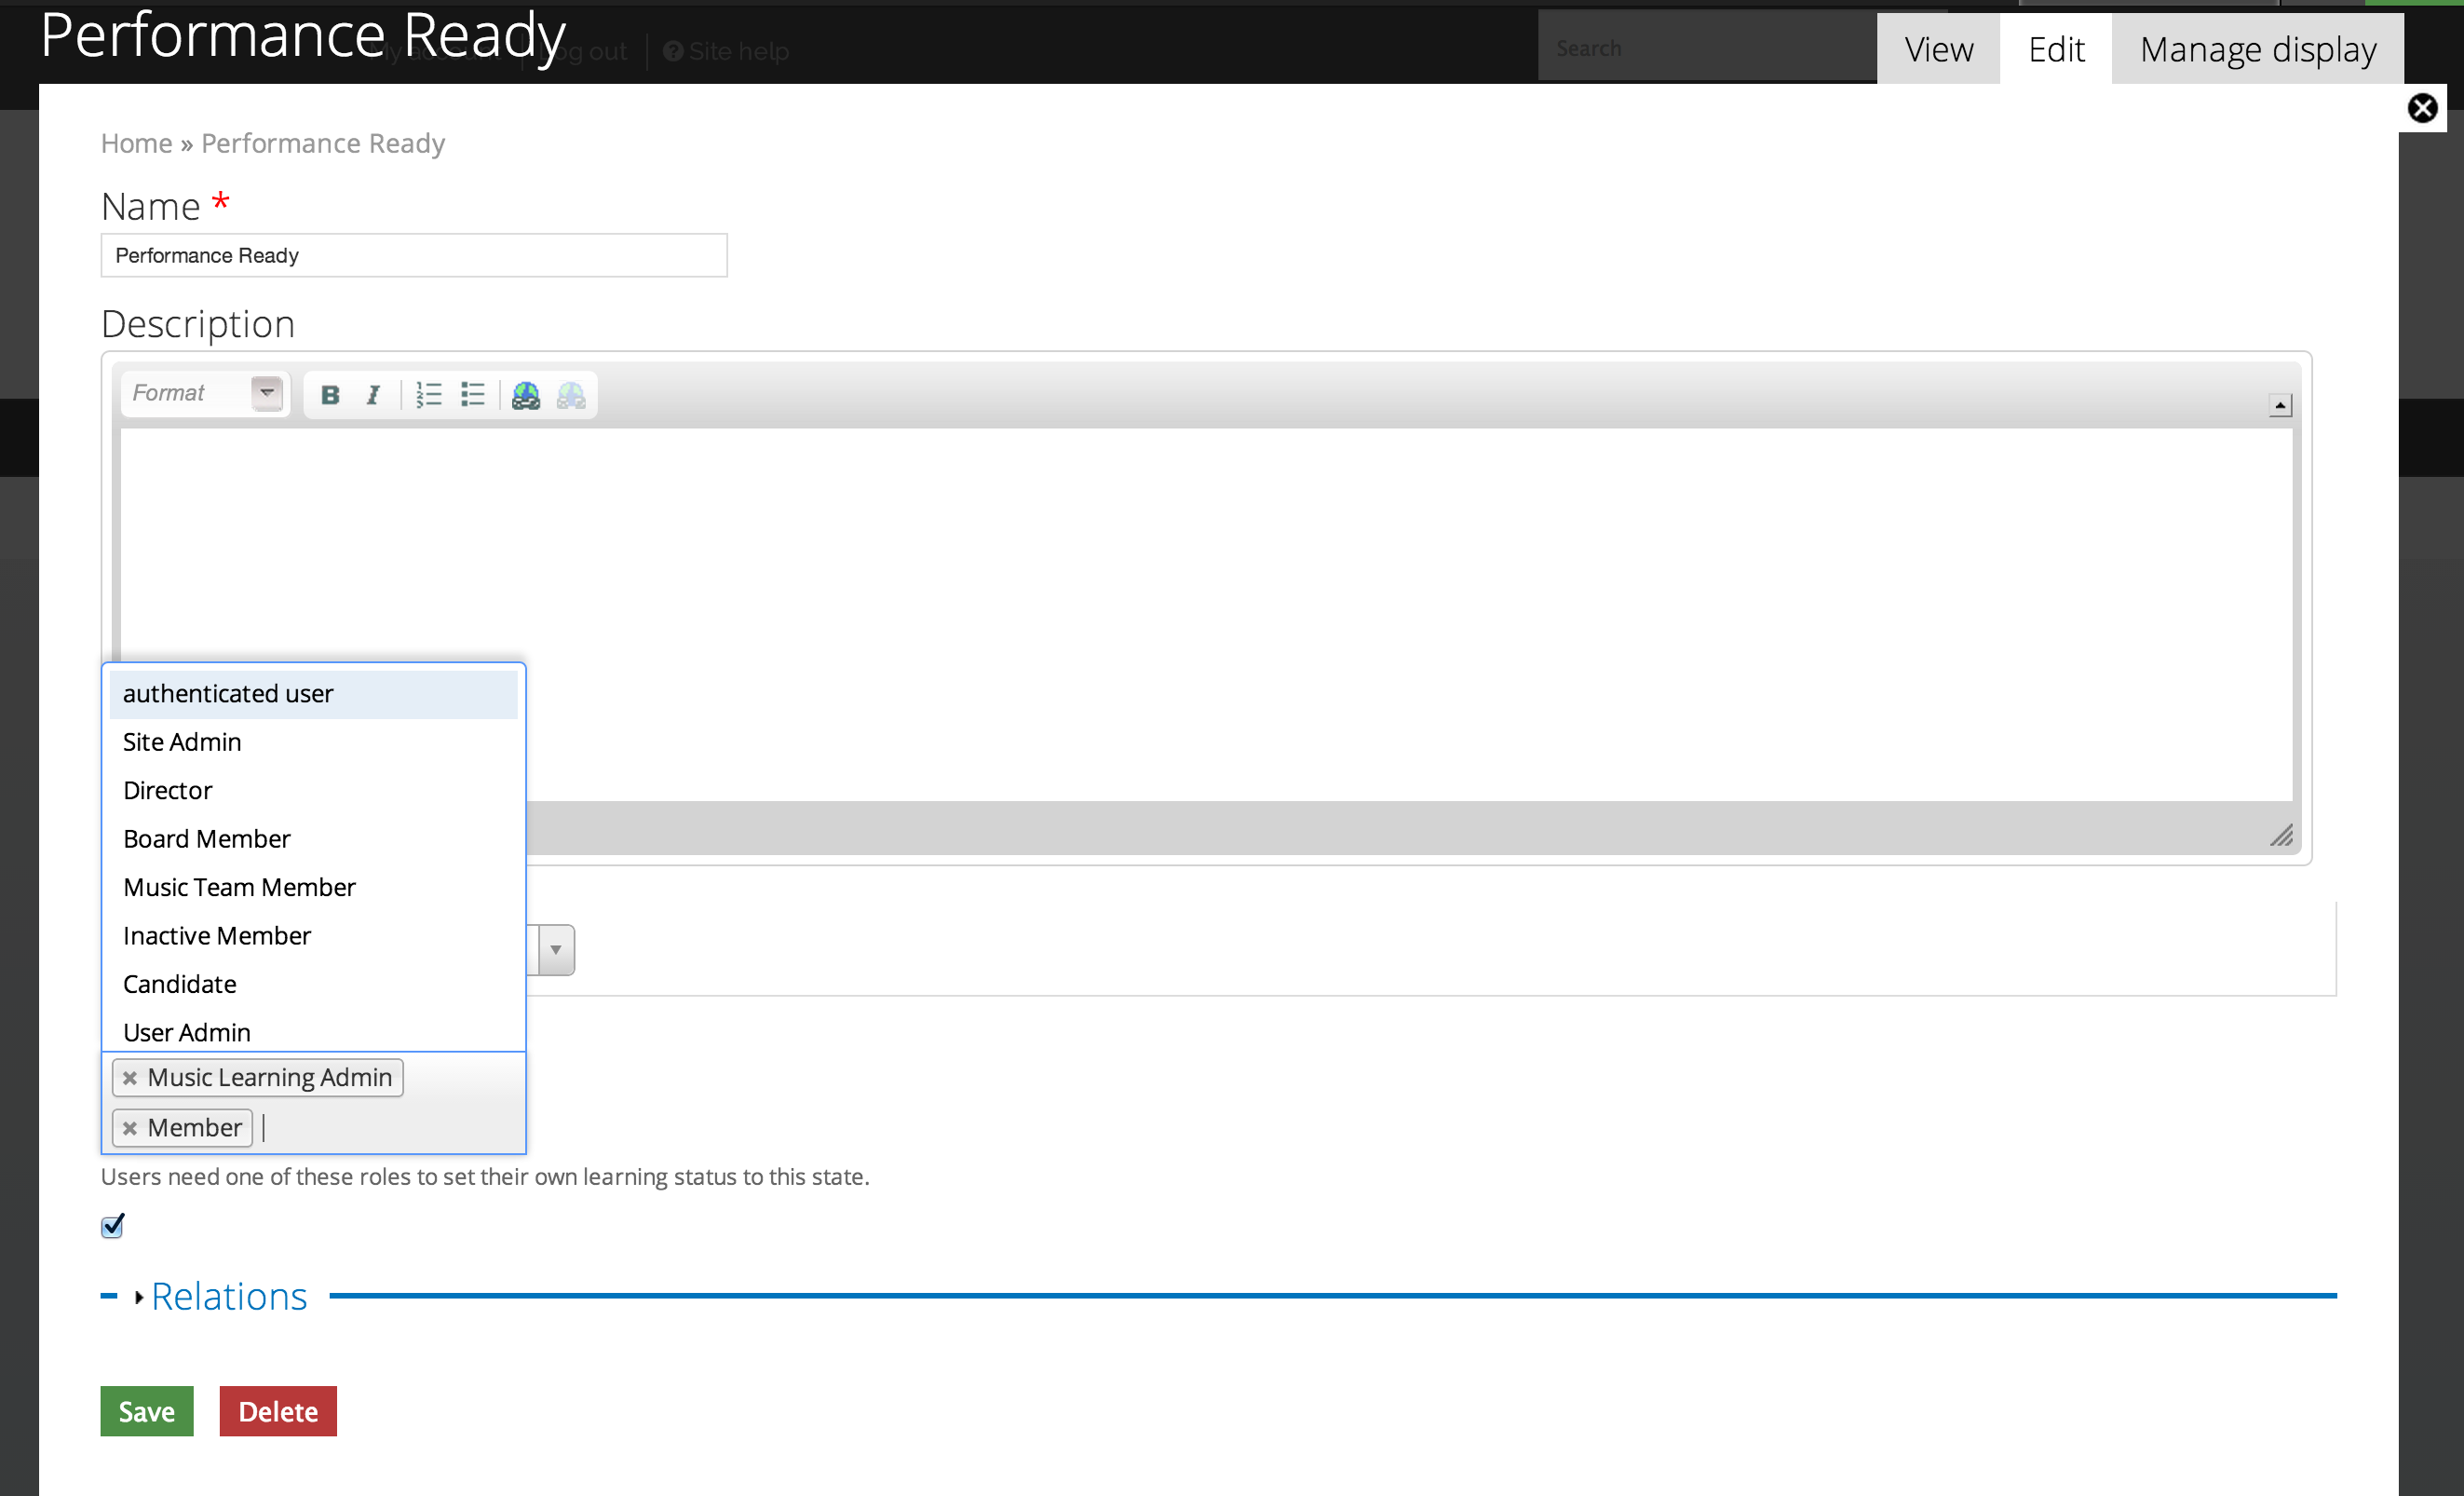
This is also important if you're adding a new learning status - you'll need to add in roles so you can configure who can use that learning state.
When you're finished making changes, remember to click save.
Configuring the Defaults
Go to: Settings & Admin > Feature Settings > Music Learning settings
Select your default settings on this page. It also includes links to access your taxonomy settings.

In the above picture you can set the defaults for when a new piece of music. This can save you time during the setup process, or when you have a bunch of new music.
Farther down the page, you'll see:

Music learning notification settings are the basic settings for your checkers and members. This relates to the settings used to send notifications about recordings and learning status changes - it does not apply to notifications about new songs to learn - that is controlled by music assignment and the advisor notification settings. You can choose to allow users to select their own user, or if not, one in the same voice part as them will be randomly assigned. If you want to control who checks who's record, you'll want to scroll down this guide to the section labeled "Using the checker assignment page"
User interface settings are used to change display options for the Music Learning Report, the My Music page and the Recording assessment page. You can read about these pages in the other sections of this guide.
Music Learning Progress block settings is a block that's available for use on the Music Dashboard (which can only be seen by Music admins, Music learning admins, Directors, and Site admins). These settings allow you to make slight adjustments to the appearance of this block. This block can also be placed in auto messages - but it will only appear for users with permission to see it's contents.

The Featured Music Categories is a block that can be used on the Main dashboard to highlight specific songs to your members, if the "My music to learn" block does not suite your needs.
Remember to save any changes you make to this page.
Using the Checker Assignment Page
This page is located in: Music Area : Checker assignment
A "Checker" is anyone with the "Music Learning Admin" role. This role allows them access to the music learning records of other users. By defaults, checkers are assigned to records randomly, but within the same voice part. If you wish to assign a particular user to a particular checker, you can do so on this page.

You can select a row by clicking on it. It will highlight a pale yellow. You can then click the "actions" button to make changes to the checker assigned to the person (or people) you've selected. You can click a row again to deselect it. You can also use the filters or the search box on the right (the one just above the table, not the top of the page) to look for specific people ot voice parts.
Once you click the action button, select "assign checkers".
From the next window, choose the appropriate checker from the list. The list will only show names of users with the role "music learning admin". alternatively, you can also choose "auto assign" to leave it on that setting for the round-robin assignment method.
Confirm your choice and wait for the status bar to fully load and the change to occur.
You will see the change reflected immediately on the checker assignment page.
Note: If music learning records have already been assigned to a specific person, (by the user or an admin), this assignment page will not override that. It will be used for auto assigned (randomly assigned) records, and any new songs that have music learning enabled.
You can check the Recording Assessment page to see the checker for an individual record, and can choose to edit the record from there.
Enabling Music Learning on a song
Please refer to the section on assigning music to learn or view.