Webform / Survey Email Options
This tutorial covers how to set up the emailing of webform submissions to specific addresses or users.
It will address:
- adding emails that receive all webform submissions
- allowing specific people to receive submissions based on the content of the components in your webform (advanced).
To make these changes, you need to go to the "Emails" link for the webform you'd like to change.
Navigate to: Communication area > Webforms / Surveys
Click on the "components" link for the webform
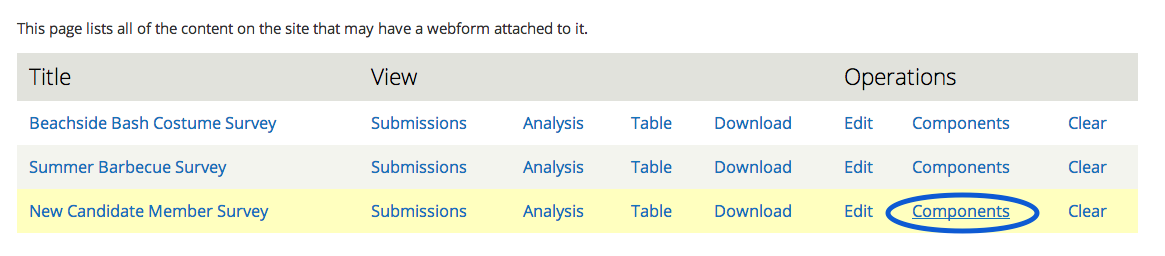
Then click the "E-mail" submenu link.
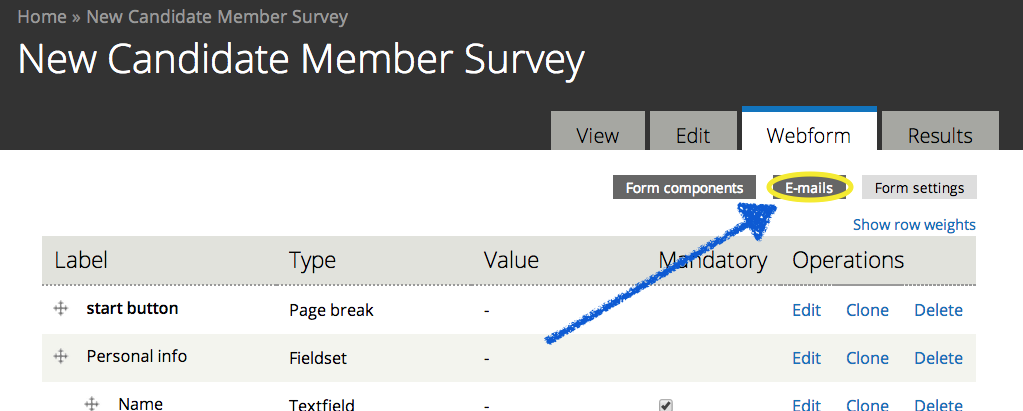
That will bring you to this page:
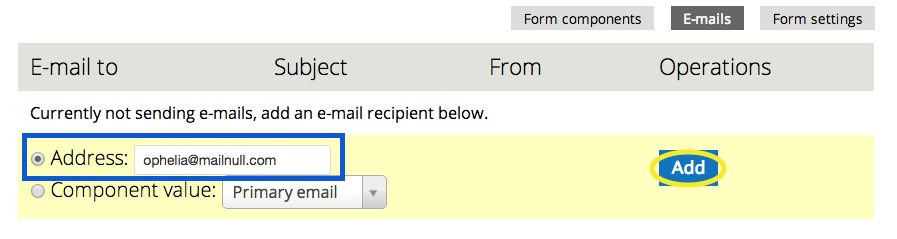
Adding an email
Step One
Fill in the email of the proper recipient, and click the "Add" button.
Step Two
Configure the email format options.
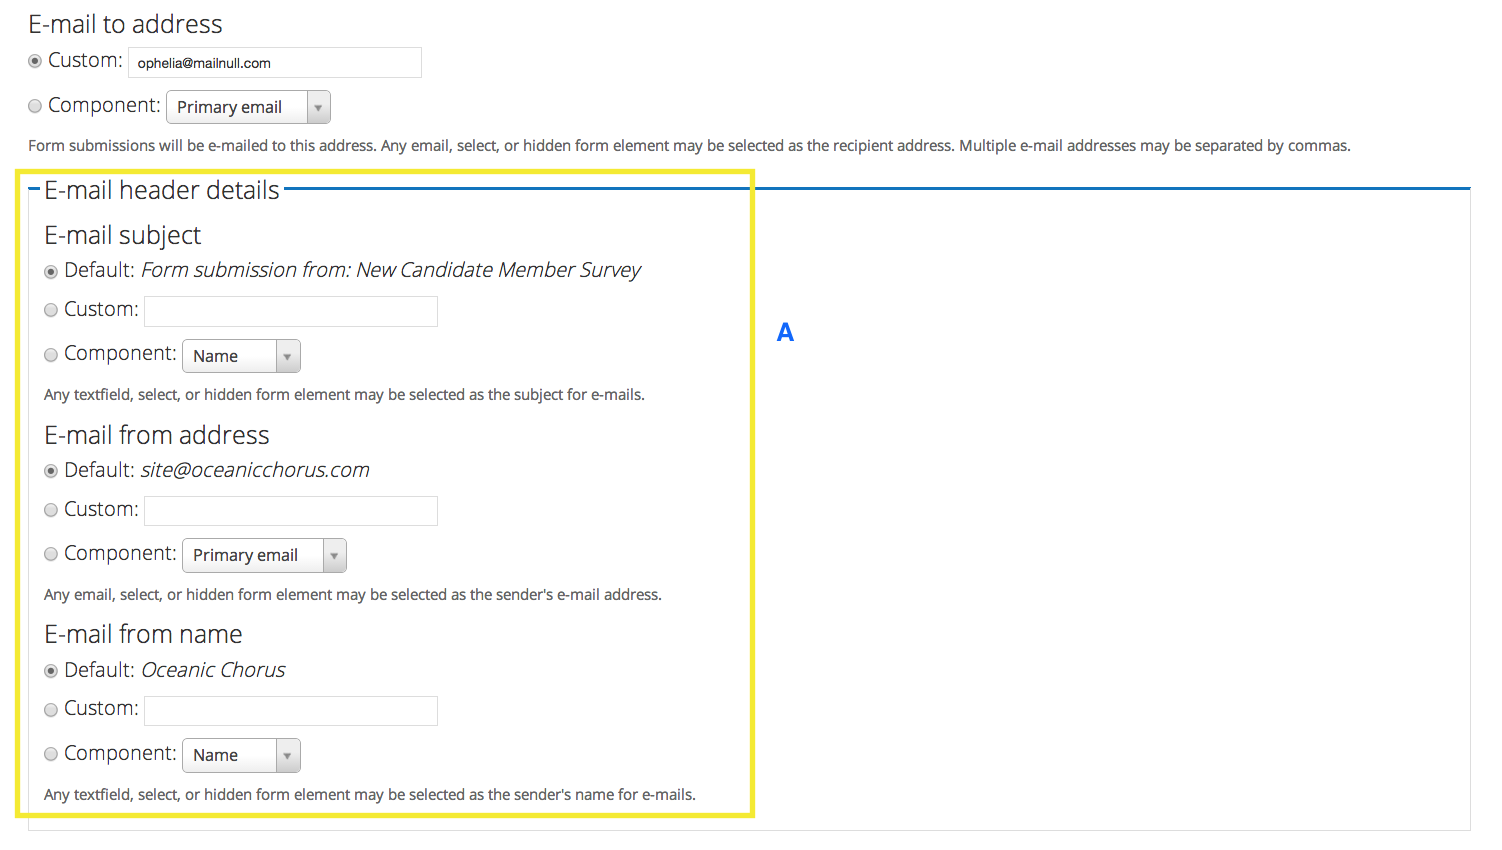
A - these settings let you adjust the email headers - ie: the subject line, and who it appears to be from. Keep in mind that changing the from email address can cause some email clients to block the email as spam.
B - these setting allow you to adjust the content of the email that will be sent. it uses tokens so that the correct links and information are filled in for each submissions. You probably don't need to change this - and it would be best to avoid deleting the tokens used - but you can always add extra information. You also have the option of having any attached files (if that component is used) sent as attachments.
C - Always remember to save your changes!
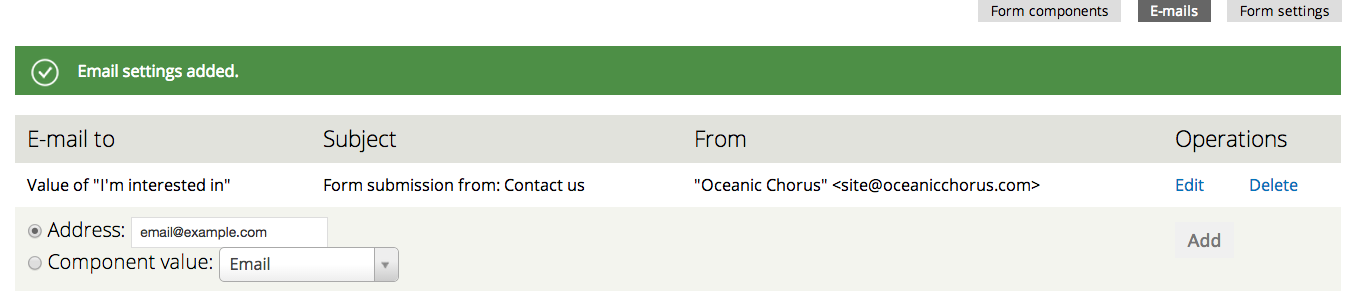
After saving - it should look something like this:

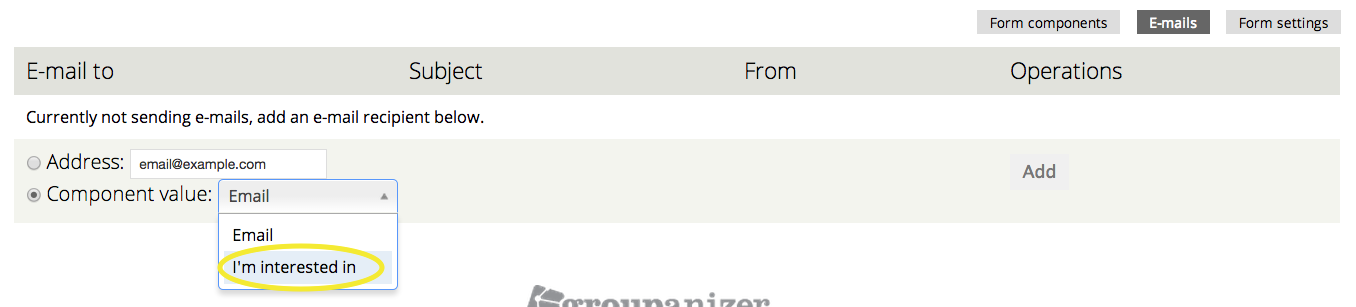
Receiving submissions based on component values
You may want to set webform submissions to be emailed to specific people. An example of this type of webform would look something like this:

In this example, we'll be setting each option under "I'm interested in" to go to a separate person.
Again, you'll need to be on the E-mails options page for the webform you're editing.
Step One
Add a "component value" option for "email to".

You will see the same email components settings page as mentioned above. There's nothing you need to change on this page. Just scroll to the bottom and save .
Step Two
Setting up the emails.
The next step is to set the right email values for each value in the multi-select component.
Chances are, when you crated your multi-select component, it looked something like this:
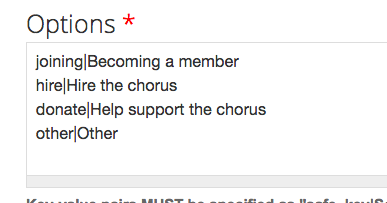
Now, we need to edit the options so that when someone selects "Becoming a member" it emails our membership coordinator.
In this example, we'll be using forwarding addresses we've configured on our site through the discussion boards .
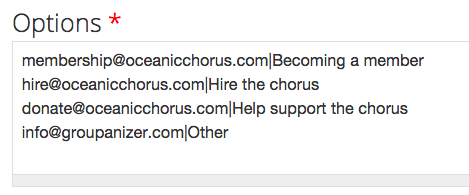
You can also set emails to go to someone's personal email, but the mailing list emails work well for sending the message to multiple people.
And as always, remember to save your changes!