Create a custom block
The dashboard is a great place to present the most important information to your members - but what about information that isn't captured by the pre-made blocks that are available?
Here's how to create a custom block!
Go to the "add a block" page
Navigate to: Settings & Admin > Site Settings > Blocks, or search for "blocks" in the menu search.
On the dashboard, you can use the quick link on the top right hand side that says "add a custom block"
Fill out the information
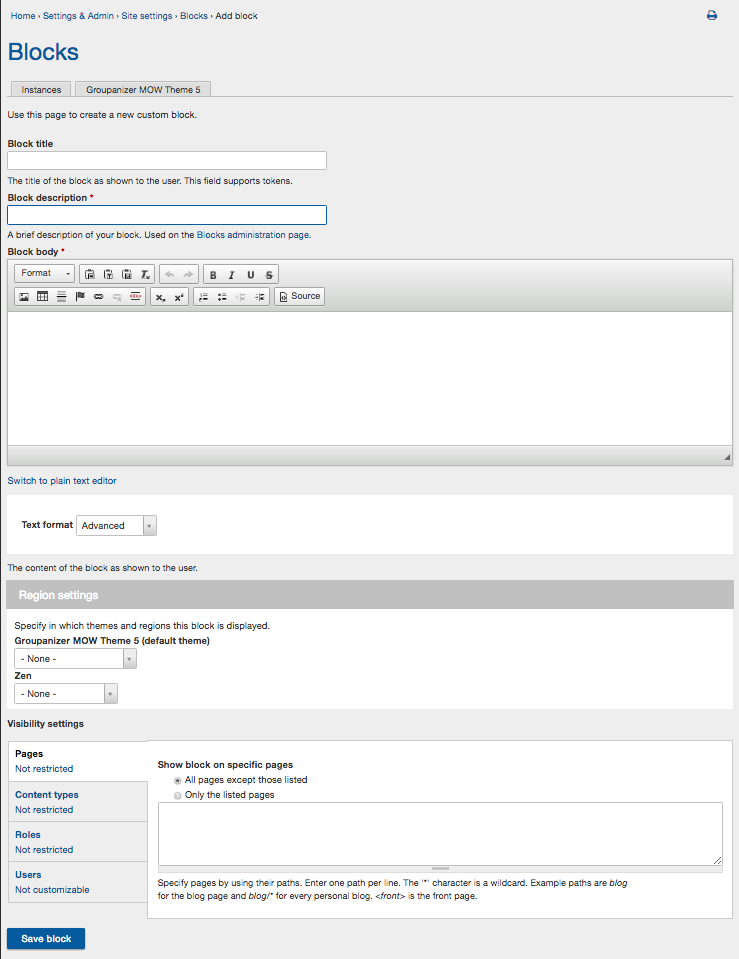
Block title and block description - The block title is the visible title of your block. You can choose to leave it empty by placing <none> in this field, or you can give it it's own title. The block description is the internal title for the block. This can be more descriptive or more technical - it doesn't really matter as long as it makes sense to you.
NOTE: if you leave the block title field empty (ie: you have no text in the field, not even <none>) the block description will be used as the block title.
Block Body - The block body is the main content on your block. It can include links to other pages, photos, or even an embedded video. Just keep in mind that there are size restrictions on the block depending on which section of the dashboard you place it on, so you may need to resize your content.
Region settings - For this type of block on a members only website, you do not need to adjust the region settings, just leave them as -None-. For the public site, choose the right content area for your theme. More information below.
Visibility - You do not need to change any of the visibility settings for a members only dashboard block. For the public site, you may want to change some visibility restrictions. More information below
Save - As always, save your changes!
After saving your block, you will be brought to the main blocks page. this page will be familiar if you've set up a public site with us, but if not, don't worry - there's nothing you need to do on this page. Simply navigate back to the dashboard.
Members only Site - Place the block on the dashboard.
Now, when you go to configure the dashboard, you should see your block listed in the available items. You can then drag it to the area of the dashboard you'd like to display it in.
Public Website - Choose a region, set visibility
You'll want to choose a region for this block to appear. This is typically the "content" area, or a "side bar".
Set the visibility for "pages" depending on how often you want to see this block. Leave the setting blank and on "all pages except those listed" to have the block appear on every page. Or, change these settings so the block does not display on certain pages, or only displays on specific pages. If you've created a custom block for the front page on your public website, choose "only the listed pages" and then type <front> in the text area. This will set the block to only display ont he front page.